When towing a caravan, knowing that you have a flat tyre cannot be immediately obvious unless you have a tyre pressure monitoring system fitted. And changing a wheel on a caravan needs more preparation and effort than replacing a wheel on a car.
In this step-by-step video, we go through how to change your caravan wheel with the help of the expert team at Lowdhams Leisureworld.
Towing with a flat tyre at speed will cause damage to the wheel and the surrounding bodywork, and if the tyre delaminates, it can cause significant damage to the structure of your caravan.
Before changing a caravan wheel make sure you’re safe and on suitable, solid ground. If your location is in any way dangerous or you’re not able or confident to change your caravan wheel then contact your caravan breakdown provider.
Tools for changing a caravan wheel
To change a caravan wheel and tyre you’ll need these tools and bits of kit:
- A jack
- Wheel chocks
- Your towing vehicle
- A wheel socket
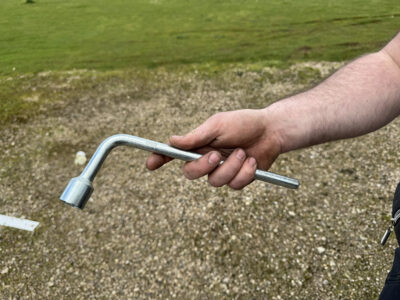
- Locking wheel nut
- A torque wrench
- Protective gvloves
- A pump with a pressure gauge
- If the caravan will be jacked up for some time, you will need an axle stand
Not all caravans have a jacking point installed – this is usually an added accessory installed onto the caravan’s chassis rail. There are a few different products available, such as the ALKO side lift jack and the KO-JACK system. Both install a jacking point onto the caravan, and then a jack attaches to this point to provide safe and secure jacking.
Note, if you have a twin axle caravan with quad motor movers, the jacking points are inaccessible, so you’ll need a specialist jack to lift up the caravan, as we’ve used in our video.
The caravan we filmed didn’t have any jacking points installed, so we used a heavy-duty jack on the axle tubes.
Step 1: Find the spare wheel
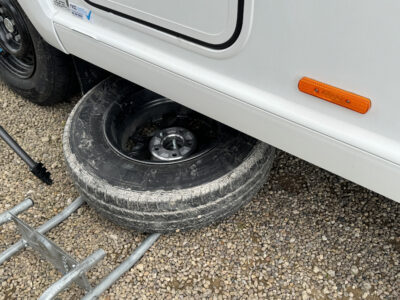
Make sure you have all the necessary equipment, start by getting the spare wheel ready. In some caravans, the spare might be stowed away under the bed, or in the front locker, but in most cases, a caravan’s spare wheel is located underneath the caravan in a carrier. This will probably be a steel wheel but it will get you to your destination safely.
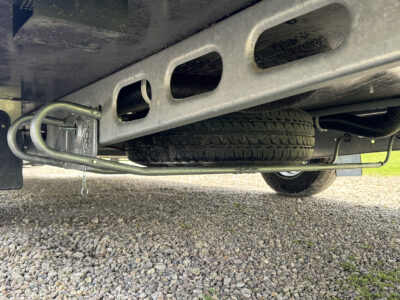
Start by removing the security pin on the carrier, then loosen the nut until it comes off. Lift the carrier and pull at the same time to remove the frame from the chassis.
Once on the floor, pull the frame back, until you have access to the bolts holding the wheel in place. It’s easy for the carrier underneath the caravan to seize up so it’s important to have your caravan serviced annually as they will make sure it’s lubricated in case you need to get to your spare wheel.
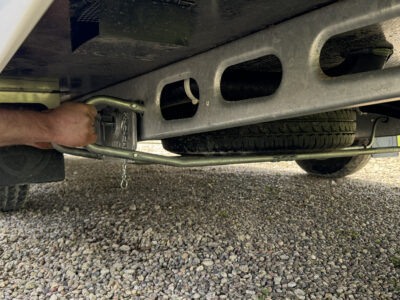
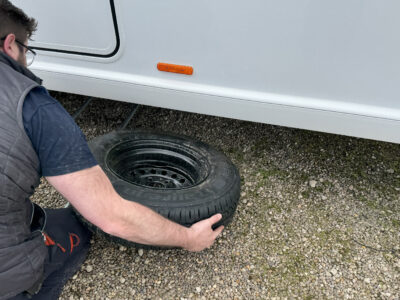
It can be tricky to access the carrier if you have a flat tyre as the caravan will be lower to the ground. If the clearance of the carrier cannot quite make it out, lower the jockey wheel to raise the back of the caravan.
Remove the two nuts from the centre of the wheel and pull it away from the caravan. Check the caravan tyre’s condition is suitable for use, that the pressure is correct, that it’s under five years old and that it doesn’t have any cracks, splits or bulges. Wipe the centre of the wheel to remove any dirt or debris. Check our tyre PACT video for details on caravan tyre and wheel safety.
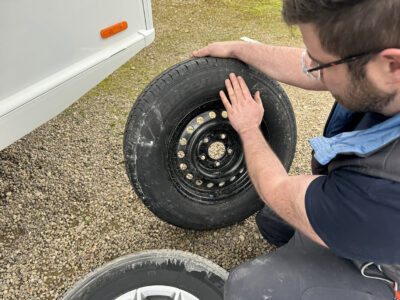
Step 2: Attach the tow car to the caravan
When jacking up a caravan, the only things in contact with the floor are the jack, the jockey wheel and the wheel or wheels on the opposite side. This can cause the caravan to twist and potentially fall off the jack so to minimise the risk, make sure the tow car is attached to the caravan hitch, if it isn’t already.
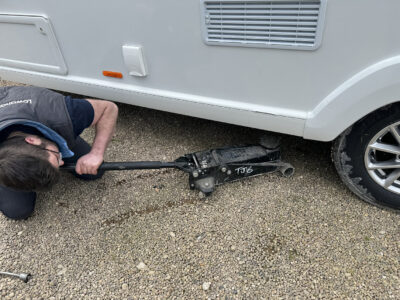
Step 3: Chock the wheel
Chock the wheel (or wheels on a twin axle caravan) on the opposite side, making sure the hand brake is on in the tow car and the caravan, and that nobody is inside the caravan. Also if your caravan has been in storage or on a holiday site make sure all the corner steadies are raised
Step 4: Loosen the wheel bolts
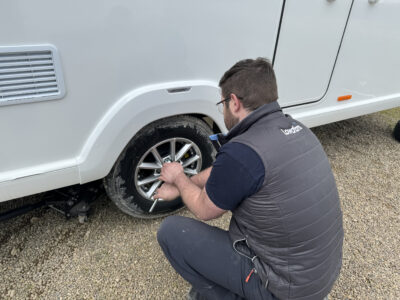
With the caravan secure, loosen the wheel nuts on the damaged wheel or tyre. Don’t attempt to remove the tyre yet.
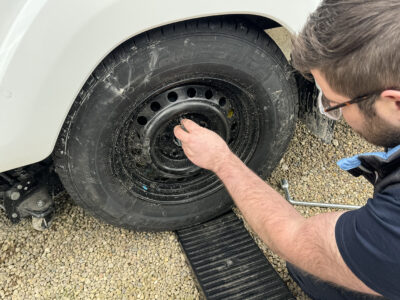
Step 5: Jack the caravan
If your caravan has jacking points, then use these with the correct jack. Don’t be tempted to use the jack supplied with your tow car as it’s likely the weight of the caravan will exceed the limit of the jack.
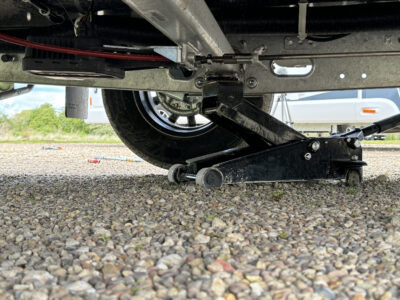
The caravan we filmed didn’t have jacking points installed, so we jacked up the caravan at the end of the axle tube using a trolley jack and positioning the jack as close as possible to the end of the axle tube.
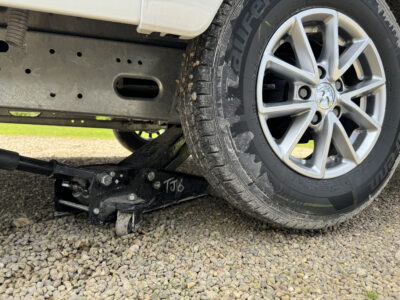
Jack the caravan until the damaged wheel is clear off the ground, making sure your legs, arms or head are not underneath the caravan. or arms
If you’re likely to have the caravan jacked up for some time, for example, if you need to go and get a replacement wheel, use an axle stand to hold the caravan in place.
Step 6: Remove the caravan wheel bolts
Continue to loosen and remove the wheel bolts of the damaged wheel, and finally remove the wheel from the caravan. A top tip here is to leave the bottom wheel nut in the wheel until last to prevent the wheel from falling. Set the wheel aside ready to go back on to the spare wheel carrier later.
Step 7: Attach the spare caravan wheel
If your caravan comes with a separate set of wheel bolts, use these to attach the spare wheel to your caravan. The spare wheel will probably be made from steel, and the bolts will be shaped slightly differently to hold the wheel in place. These may also need a different torque setting, so check your manual for the correct value.
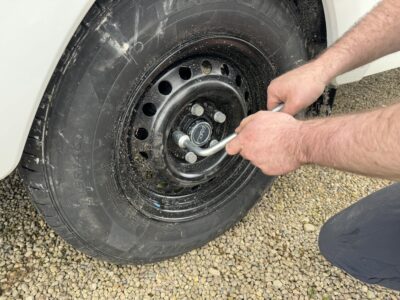
Position the spare wheel on the hub and rotate gently until the bolt holes line up with the hub. Once they align, add one bolt and rotate by hand to hold the wheel in place.
With the wheel in place, add the rest of the bolts in a star formation, again until hand tight. Use a wrench to tighten all the bolts.
Step 8: Lower the caravan
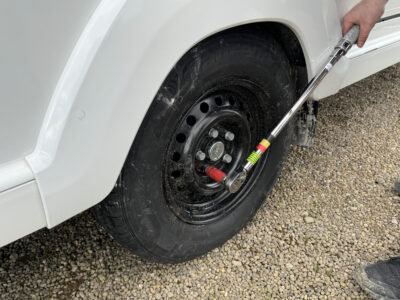
Remove any tools and axle stands from under the caravan then release the jack to lower the caravan to the ground. Then torque the wheel nuts to the correct setting in a star formation – this will be detailed in your caravan handbook, or it can be on the caravan weight plate.
Step 9: Stow the damaged caravan wheel
Reattach the punctured or damaged caravan wheel to the spare wheel carrier. You might need to remove the centre cap from the wheel to reattach it to the carrier. Reinstate the spare wheel carrier back onto the caravan, screw on the locking ring, and don’t forget the security pin to prevent it from coming undone.
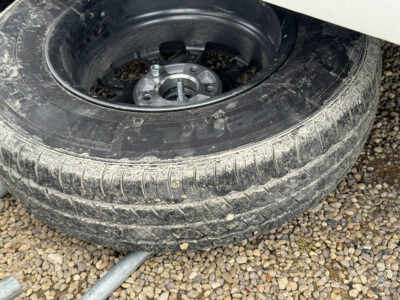
Don’t forget to gather all your tools, then finally, check the torque of the newly attached caravan wheel after 75 – 100 miles of travel.
Before setting off on your caravan travels, it’s a good idea to know where your caravan’s spare wheel is stored, how it’s removed, and that you have the right equipment to remove and replace it if needed.
An external spare wheel carrier can become seized so it’s important to have an annual caravan service as they will make sure it’s kept in good working order. Do check it yourself now and again too, to make sure you can easily access the spare wheel if needed.
Tyre Pressure Monitoring
A tyre pressure monitoring system will monitor the pressure in your caravan tyres and the temperature when towing. Fitted to your caravan tyre valves, they relay the pressure and temperature of each tyre to a dashboard or windscreen-mounted display. This will alert you if something is wrong before any damage is caused, as well as give you time to find a safe place to pull over.
A tyre pressure monitor or Tyron bands will also save you money on your caravan insurance premium with Caravan Guard*.
It’s also a good idea to have a separate breakdown policy for your caravan so you can call for help in the event of flat tyre that’s too tricky to deal with yourself.
Got any further tips for changing a caravan tyre? Let us know in the comments below.
*Details correct at time of initial publication (May 2024). We reserve the right to remove discounts at any time. Minimum premiums apply.


How would you rate this article?
Comments